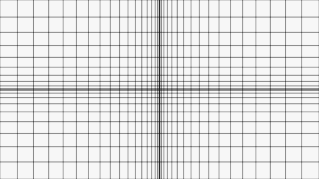
Barrel Distortion
Note: the OpenGL code used to generate these screenshots lives in this github project for your enjoyment.
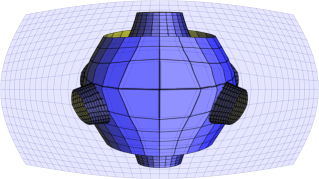
Barrel distortion simulates a fisheye lens by changing the magnification factor according to polar distance. Often the magnification is proportional to the squared distance. Here’s a GLSL snippet that performs barrel distortion:
uniform float BarrelPower;

// Given a vec2 in [-1,+1], generate a texture coord in [0,+1]
vec2 Distort(vec2 p)
{
    float theta  = atan(p.y, p.x);
    float radius = length(p);
    radius = pow(radius, BarrelPower);
    p.x = radius * cos(theta);
    p.y = radius * sin(theta);
    return 0.5 * (p + 1.0);
}
This function transforms the input into polar coordinates, tweaks the radius, then converts it back to texture space.
In olden times before shaders, barrel distortion could be achieved by simply rendering the scene into a texture, then applying the texture to a 2D grid of vertices. The grid would look something like this after the pushing around the verts:
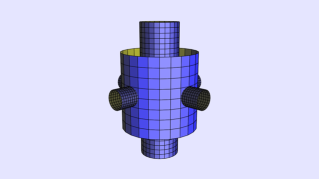
Here’s the source image:
One issue with this approach is poor sampling at high magnification, resulting in fuzziness towards the center. The same problem crops up when performing distortion in the fragment shader.
The fuzziness can be improved somewhat with a custom high-quality filter (e.g., Gaussian) in the fragment shader, instead of relying on the crude bilinear filtering that the hardware provides.
Vertex-Based Techniques
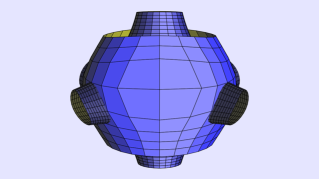
Another possibility is performing distortion in the vertex shader. This gives a clean result, although coarsely-tessellated models will have straight edges, and they’ll suffer from snapping artifacts during animation. Here’s a test of vertex shader distortion:
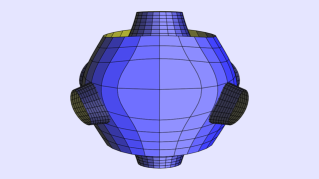
On a modern GPU we can employ a simple tessellation shader, performing distortion in the subdivided mesh. This allows for curved edges:
Tiled Rendering
If you’re stuck with texture-based deformation and you need to improve the sampling rate at any cost, one crazy idea is to use tiled rendering. This is a technique often used for offline rendering – it renders the scene in many passes, snipping out a portion of the viewing frustum at each pass using a special projection matrix.
To help with sampling issues in barrel distortion, each off-screen tile has the same resolution, but the viewport sizes vary according to distance-from-center, as visualized here:
The projection matrix magic for snipping out a portion of the viewing frustum is the same as a pick matrix:
// x and y specify the center of a picking region in window coordinates
// width and height specify the size of the picking region in window coordinates
// viewport is what's returned by glGetIntegerv(GL_VIEWPORT, ...)
Matrix4 M4PickMatrix(GLfloat x, GLfloat y, GLfloat width, GLfloat height, GLint* viewport)
{
    float sx = viewport[2] / width;
    float sy = viewport[3] / height;
    float tx = (viewport[2] + 2.f * (viewport[0] - x)) / width;
    float ty = (viewport[3] + 2.f * (viewport[1] - y)) / height;
    Matrix4 m;
    m.col0.x = sx; m.col0.y = 0.f; m.col0.z = 0.f; m.col0.w = tx;
    m.col1.x = 0.f; m.col1.y = sy; m.col1.z = 0.f; m.col1.w = ty;
    m.col2.x = 0.f; m.col2.y = 0.f; m.col2.z = 1.f; m.col2.w = 0.f;
    m.col3.x = 0.f; m.col3.y = 0.f; m.col3.z = 0.f; m.col3.w = 1.f;
    return m;
}
Using tiled rendering to deal with sampling artifacts is crazy though. If you really want to avoid bad sampling, you should probably simply go with a vertex-based approach. Feel free to steal from my code:
Have fun!
